How to Recover iPhone Data after Updating to iOS 9
Inherit to iOS 8, iOS 9 will is a system to change the world, it is different from previous iOS 8, increased a lot of unexpected new features, get the iPhone iPod and iPod users better upgrade experience. Are you also can't wait to upgrade your iPhone to the iOS 9? That must be great. However, iPhone system upgrade, often will bring certain negative influence to the user, the most direct performance is the loss of iPhone data. Learn the lesson of iOS 8 upgrade, many users know to back up their iPhone data before upgrading to iOS 9, while a simple backup is not enough, you need a more comprehensive defense or preparation. For the sake of the big picture, and save your time, we recommend you to use the iPhone Data Recovery.
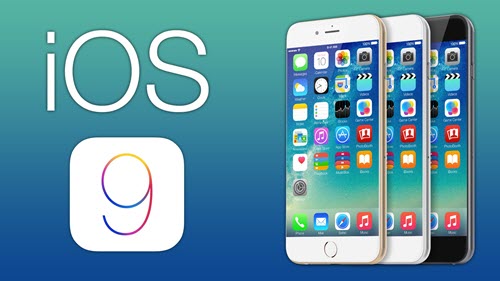
iPhone Data Recovery is the all-round and professional data recovery software that providing the most perfect solutions to recover your lost or deleted data like contacts, messages, call history, notes, WhatsApp data, reminders,Safari bookmarks, Calendar, photos, videos, and more from iPhone after updating to iOS 9. The recovery program allows you to restore your data from iPhone with 3 simple yet reliable methods:
Methods 1. Direct Restore Lost Data from iPhone
Methods 2. Extract to Recover from iTunes Backup Files
Methods 3. Extract to Recover from iCloud Backup Files
To completely retrieve your lost iPhone data after updating to iOS 9, please free download a trial version here first and have a try.
.png)
.png)
Attention: Don't use your iPhone or sync your iPhone with iTunes after you lost data from it. Any operation on your iPhone can generate new data, which can overwrite your lost data and make it unrecoverable.
3 Simple Ways to Recover Lost iPhone Data after Updating to iOS 9
Methods 1. Direct Restore Lost Data from iPhone
Step 1. Connect your iPhone to the computer
Install and launch the iPhone Data Recovery on your PC, and connect your iPhone device via an USB cable. Then you'll see the primary window as the below picture.
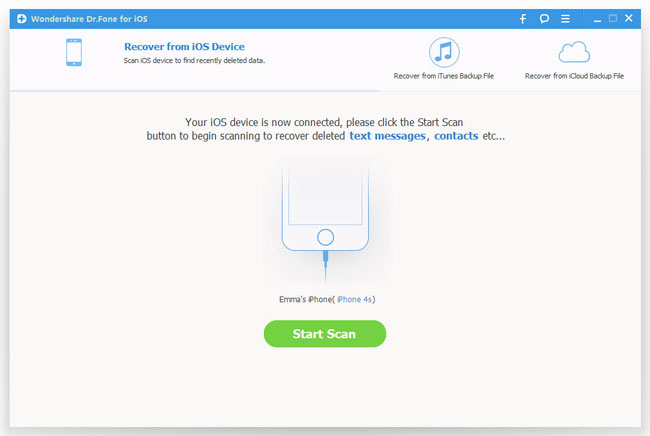
Note: If you use an iPhone 4/3GS, as well as iPad 1 or iPod touch 4, you can switch to the "Advanced Mode" through the button at the lower-right corner.
Step 2. Scan the lost data on your iPhone
Click on the "Start Scan" button, and the program will automatically scan the existing or the deleted data on your iPhone immediately.
.jpg)
Note: For the "Advanced Mode", you need to follow the description in the pop-up interface to get your iPhone 4/3GS, as well as the iPad 1 and iPod touch 4 scanned deeply.
Step 3. Preview and recover lost data from your iPhone
After a few seconds, all data in your iPhone will be displayed in categories, including your lost data and the existing data on your iPhone. You are allowed to press the menu on the left side of window to preview the content you want one by one, such as contacts, messages, and so on. After that, click on "Recover" button to begin restoring all the selected data back to your computer.
.jpg)
Methods 2. Extract to Recover from iTunes Backup Files
Step 1. Choose your iTunes backup and scan to extract it
When running the program, click "Recover from iTunes Backup File" on the primary interface to brings up the iTunes backup recovery window, here, you can see all the iTunes backup files of your iPhone or other iDevices which was created on this computer, choose one you want and click "Start Scan" to extract it.
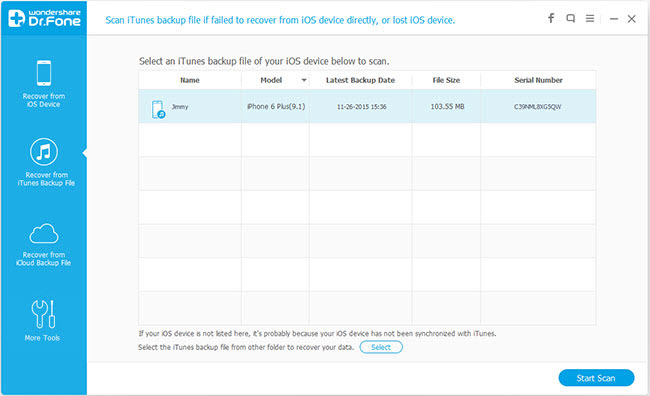
Step 2. Preview and restore previous data as you like
The scan will take you some time. Once it's complete, you can see all data in the backup file will be extracted and displayed in categories. Check and preview them one by one, mark whose what you want and click "Recover" to save them back to your computer with a click.
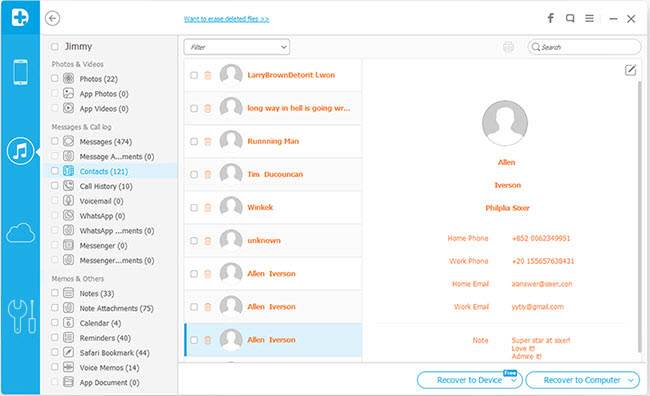
Methods 3. Extract to Recover from iCloud Backup Files
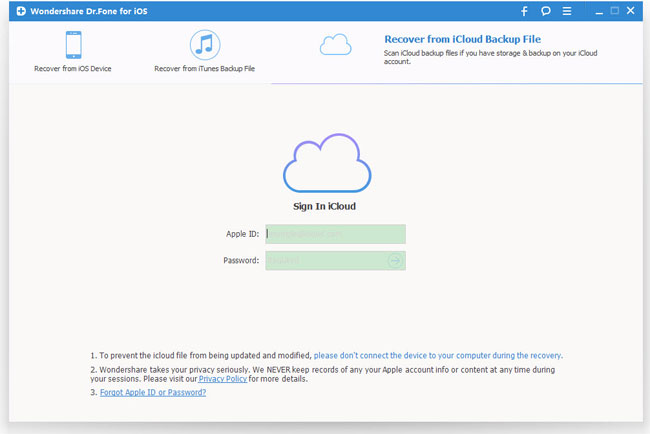
Step 1. Choose the iCloud backup recovery mode and log in your account
Choose the recovery mode of "Recover from iCloud Backup Files", and sign in your iCloud on the pop-up interface.
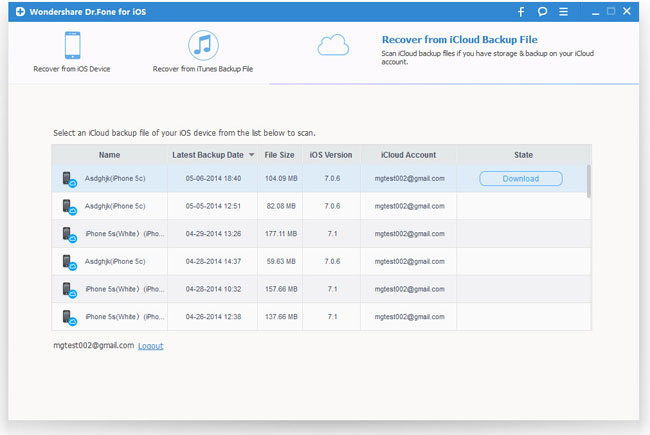
Step 2. Download and scan your iCloud backup
Once you signed into iCloud, the iPhone Data Recovery will automatically find and show all the iCloud backup files to you, choose the one you want and download it. If done, click on "Scan" to scan and extract the data from it.
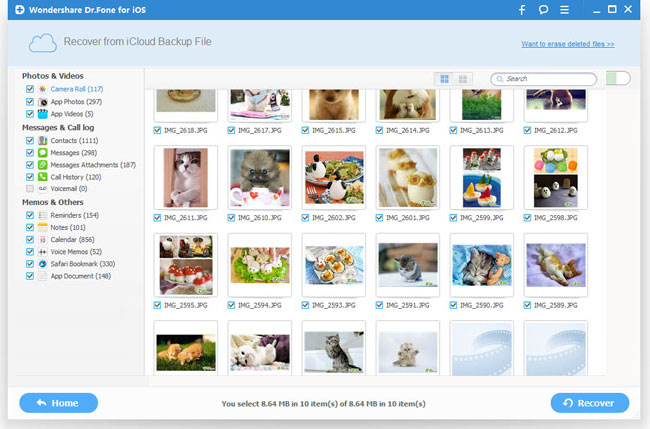
Step 3. Preview and recover the data selectively
The scanning program will be finish in a few minutes. Once it complete, you can preview almost all data in your iCloud backup file, like contacts, SMS, call history, and so on. Preview to mark them one by one as you like. If everything is OK, click on the "Recover button" to get them back to your computer with one click.
Free download the iPhone/iPad/iPod Data Recovery:
.png)
.png)
Related Articles

.png)
.png)

.jpg)
.jpg)


.png)
.png)
