Four Ways to Speed Up Your iPhone iPad iPod on Mac
Undoubtedly, iOS is now one of the best operating system, however, no matter how good the system still will generate the cache when you playing games, running an App, watching online videos, taking photos, surfing the internet and so on. So, you may have felt that the operating system of your iPhone, iPad or other iOS devices is becoming more and more slow. If you are as the user who use iDevice and Mac at the same time, you must be interested in how to free up space on your iPhone, iPad or iPad on Mac.
iOS Data Eraser for Mac is such an ideal and all-in-one yet easy-to-use data erased and managment software that providing four simple ways for iPhone iPad and iPod touch user to free up the device's space on Mac. In addition, the wiping program also allows you one click to erase all data or all the deleted data from your iOS device without losing jailbreak, what's more, all the erased data can not being restored even using the most professional data recovery tools.
Downloading to install a trial version here and follow the below ways to speed up your iPhone, iPad as well as iPod touch now.
Four Ways to Speed Up Your iPhone iPad and iPod Touch on Mac
Note: The program lets you delete all data or cache of once deleted files from your iOS device permanently. After deletion, even iOS Data Recovery can't retrieve any data from your iPhone, iPad, and iPod touch. So, you've better backup the data you still want before erase your device(s).
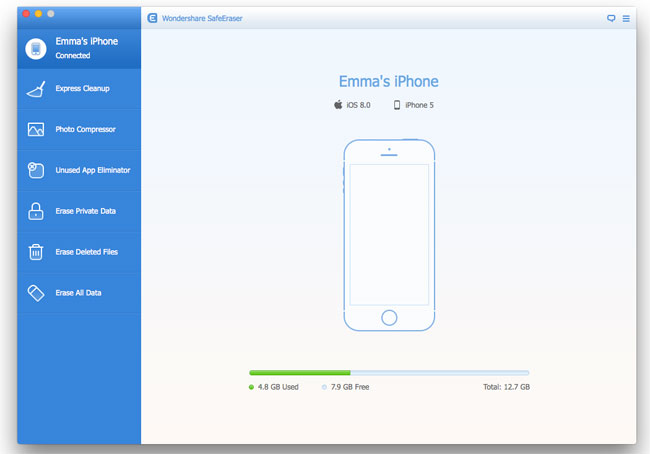
Before erase your iOS device, please install and launch the iOS Data Eraser on Mac, then connect your device to Mac via its USB cable. When the primary window pop up, you can see different options in the left sidebar and your device display on the right.
Step 1. Scan the junk files from your iDevice
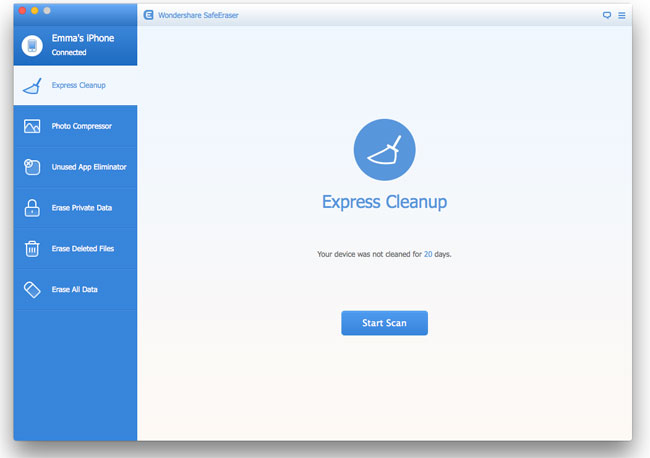
Click "Express Cleanup" in the left column, and tip "Start Scan" to scan the junk files on your device.
Step 2. Erase the selected junk files
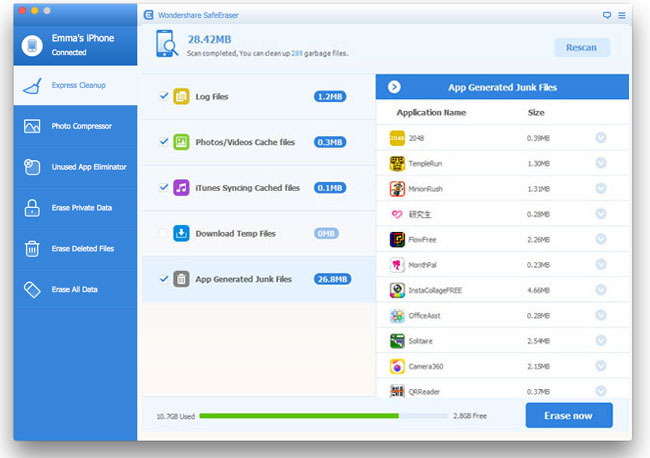
Once the scan is completed, the total amount of junk files is displayed and the amount for each type of junk file is displayed too. Now, you can previewing to check unwanted junk file types and click on the "Erase now" button to clean them from your iPhone, iPad, or iPod touch. If the program finish, click "Done".
Step 1. Scan the photos you need to compress
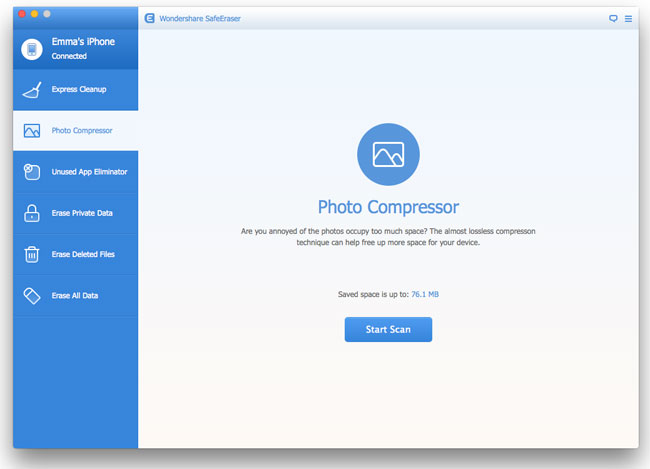
Click "Photo Compressor " in the left column. Click "Start Scan" to enable the program scan your iOS device for large photos in the Photo Compressor window. Please be patient, this precess will not spend too much of your time.
Step 2. Compress the selected photos for your device
After the scan, all large photos will be displayed in the window, you can preview them one by one, then check those what you want, and click "Compress now" to start compress the selected photos, it take a few seconds to finish, once done, the program will tells you how much space you’ve saved by compressing photos and how much space left for current photos.
Note: Every time you compress the photos for your iPhone, iPad or iPod touch, the program will automatically backup all your large photos before compressing, you can click the "Backup path" which near the "Compress now" button to change the photo backup saved path.
Step 1. Scan the unused apps for your iOS device
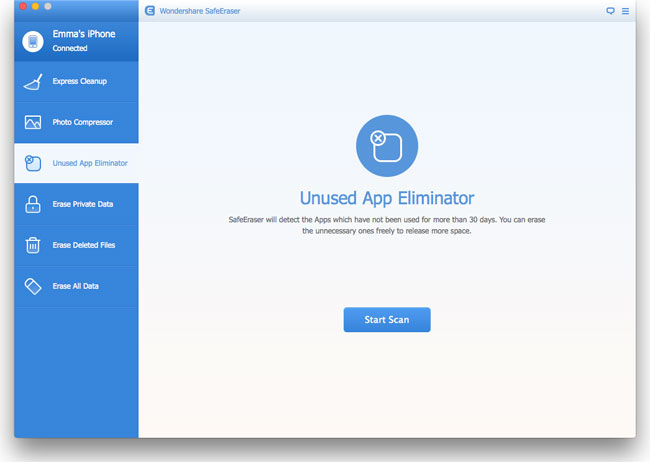
Click "Uninstall App Eliminator" > "Start Scan" to let the program scan the uninstall apps that you haven’t used for 30 days on your iDevice.
Step 2. Uninstall the unused apps with a click
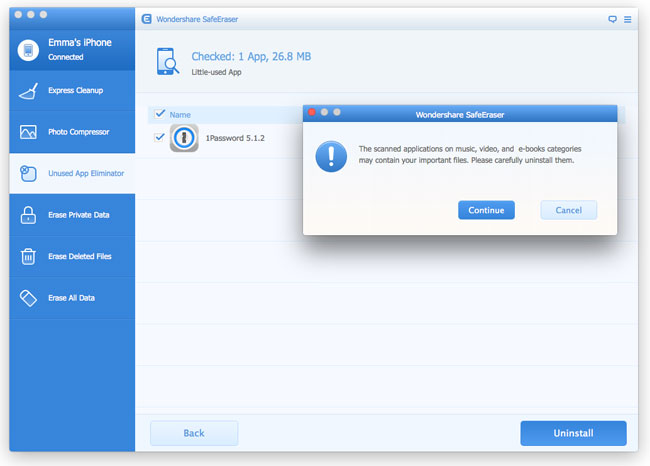
After a few minutes scan, all the unused apps that haven’t been used for 30 days will be displayed in the result panel. Now you can check the apps you unwanted and click on "Uninstall" button to uninstall them from your iPhone, iPad and iPod touch.
Step 1. Scan the deleted data on your iPhone iPad or iPod touch
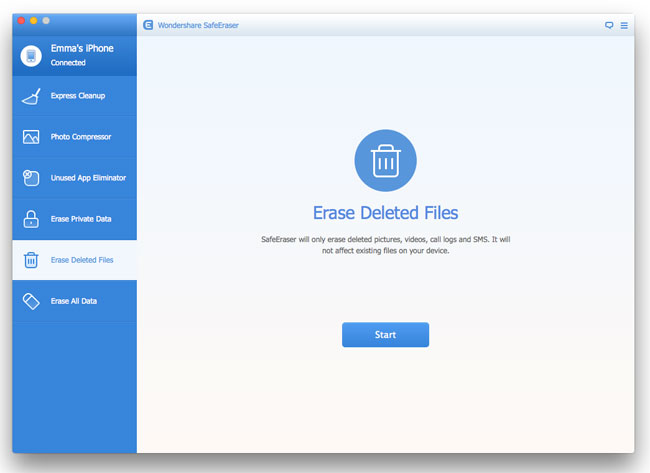
Click "Erase Deleted Files" in the left column and click "Start" to scan the data that your deleted on your iOS device before.
Step 2. Selectively erase deleted files you want from your device permanently
When the scan is finished, all the deleted files will be displayed in the right panel. You are allowed checking to preview the corresponding file type to see the details. Meanwhile, pick out those what you want to erase and click "Erase Now", then in the prompt, type the word "delete" to confirm the deletion. After that, the program will completely erase the selected deleted data on your iOS device. Please do not disconnect your device during the wiping process.
Note: During the process, the deleted files which you’ve backed up to your iTunes will also be erased, ensuring the data is unrecoverable via iTunes in the future.
Related Articles

.jpg)
