How to Recover Deleted & Lost Photos on Mac
Accidentally emptied photos on Mac recycle bin and want to recover them? Looking for a way to recover photos from camera memory card on Mac? Still troubled that don't know how to recover deleted pictures from SD card? As a Mac user, will inevitably encounter some difficult problems as above, instead of looking for solutions, you might as well try some simple and effective recovery tool, Photos Recovery for Mac is the best choose.
Photos Recovery for Mac is an user-friendly and fully-featured photos, pictures, and images recover tool, allows you to restore lost photos, pictures, and images on your Mac hard disk cameras, memory cards, USB drives, mobile hard drives or mobile phones no matter they lost due to accidental deleting, formatting, software crash, improper device usage, virus infection, and other reasons.
The longer time you delay, the greater the chance of data are covered, the higher the recovery difficulty. If you have decided to recover the lost photos, you can free download the trial version below and have a try.
.jpg)
.jpg)
Few Steps Recover Deleted Photos, Images & Pictures
Step 1: Launch the program
Launch Photo Recovery after install it on your computer. Then you can see three buttons showing on the main window as below.
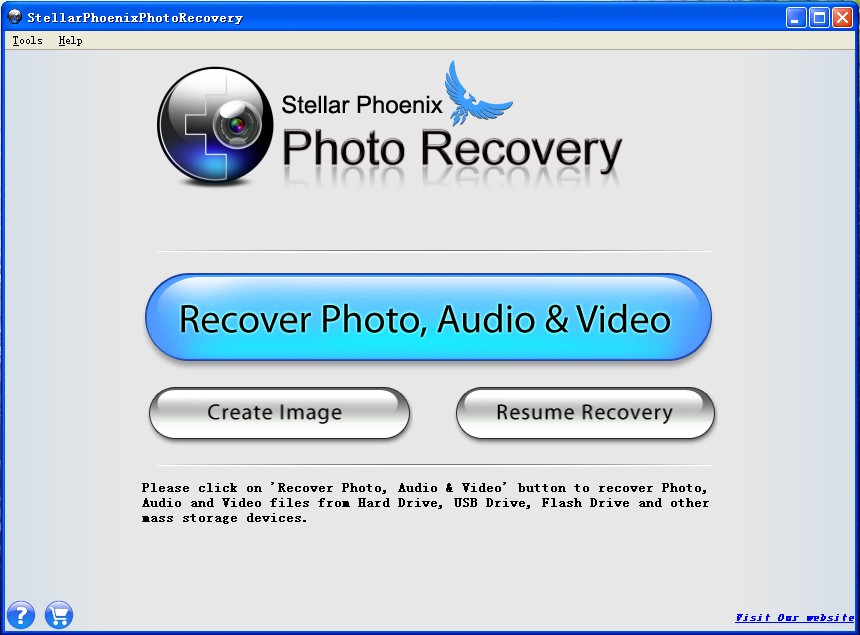
1) Button 1: Recover Photo, Audio & Video
Please click on "Recover Photo, Audio & Video" button to recover Photo, Audio and Video files from Hard Drive, USB Drive, Flash Drive and other mass storage devices.
2) Button 2: Create Image
This method takes sector by sector image of the selected region. It is useful in case your media has developed bad sectors. This image can be used later to recover data.
3) Button 3: Resume Recovery
Use this option to resume data recovery process.This option requires previously saved scan information or image of storage device.
Here we take “Recover Photo, Audio & Video” as an example continue to introduce the guide.
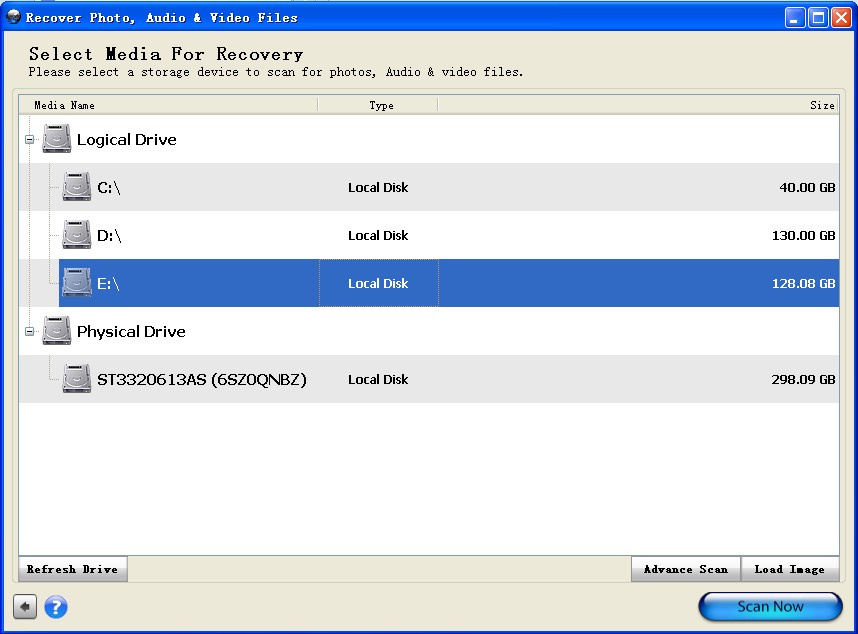
Step 2: Select Media, File Format and Drive Region For Recovery
Select Media For Recovery:Now, please select a storage device to scan for photos, audio & video files.
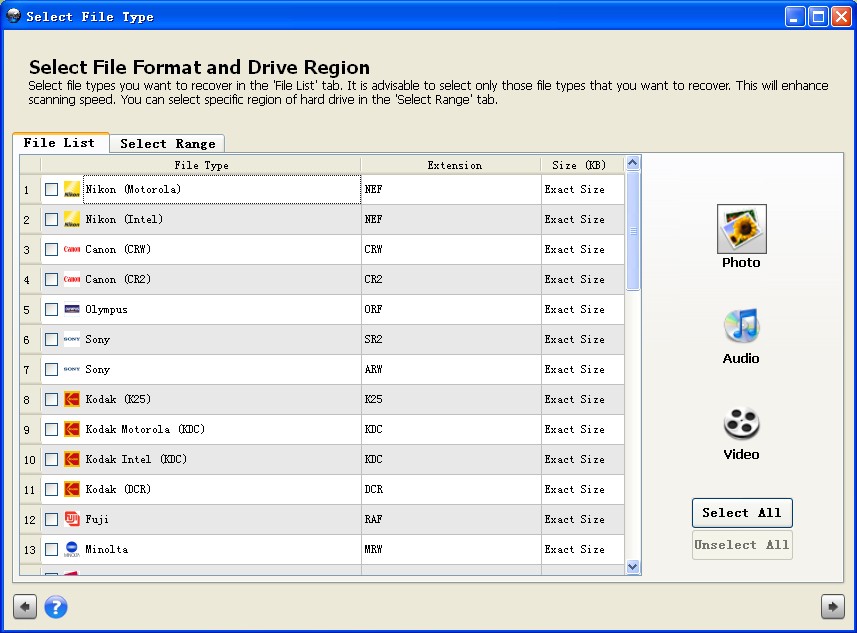
Select File Format and Drive Region:Select file types you want to recover in the"File List"tab. It is advisable to select only those flle type that you want to recover. This will enhance scanning speed. You can select or unselect all of them by switching the“Select All”or“Unselect All”button.
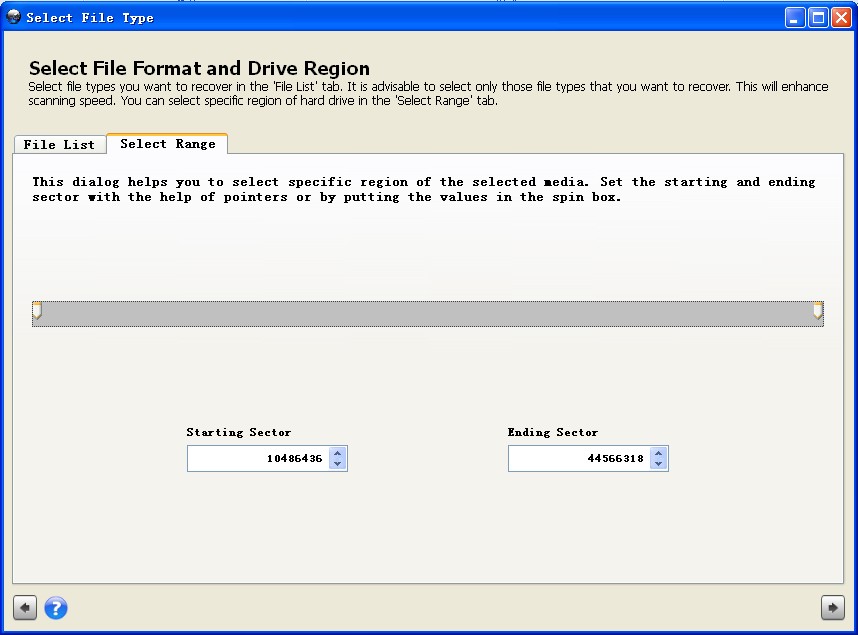
You can select specific region of hard drive in the "Select Range" tab.This dialog helps you to select specific region of the selected media. Set the starting and ending sector with the help of pointers or by putting the values in the spin box. If done, skip to next step.
Step 3: Scan and preview the scanning result
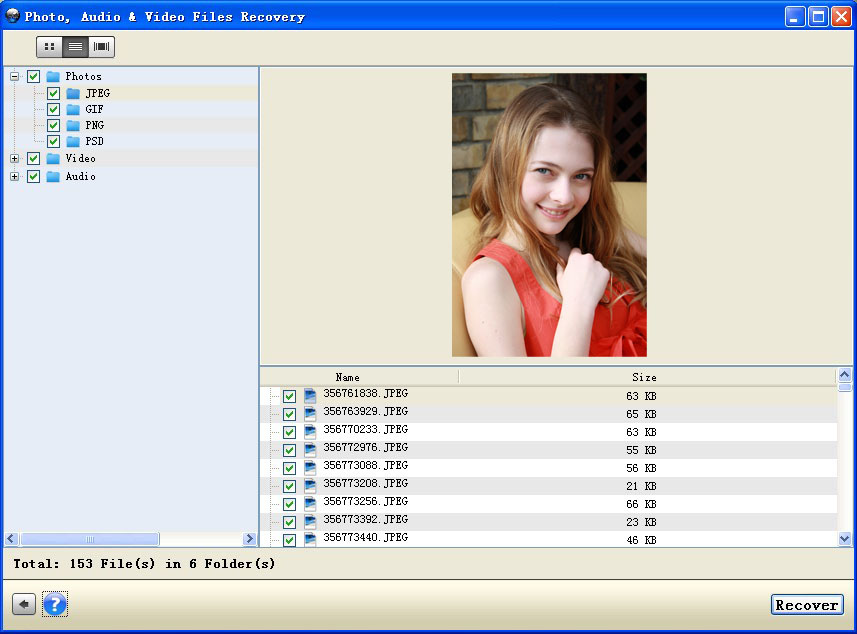
After a few minutes scanning, all the data which found on Mac including hard drive and external storage devices will be listed in the left of window. You can expand and check them one by one. You are also allowed to preview them under 3 kinds of preview modes: “Cover Flow View”,“Thumbnail View”, and“List View”
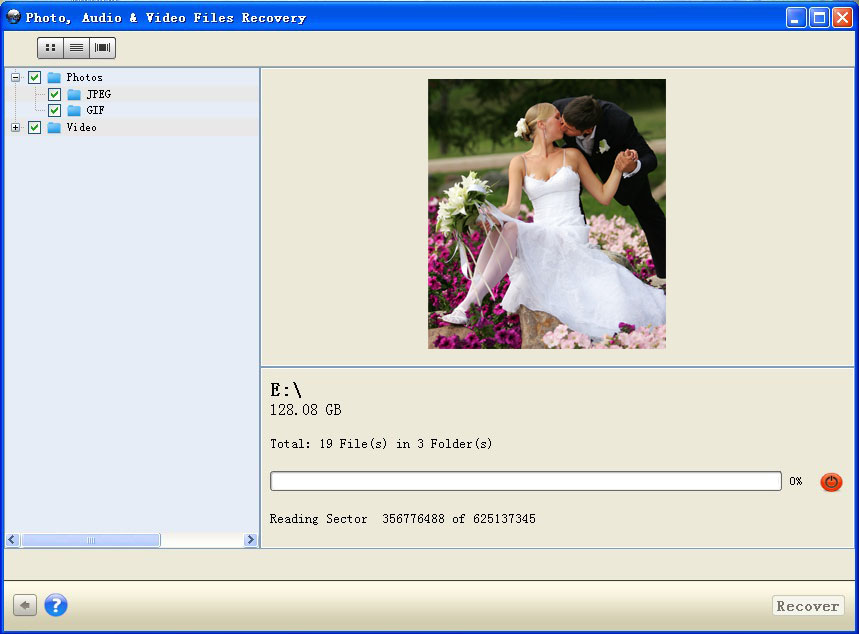
Step 4: Selectively recovery
In the last step, what you need to do is choose those you want, and click on “Recover” to save them back to your computer. Here you can click“Choose”to select the location where the recovered files will be saved in the“Open Directory”dialog box.
.jpg)
.jpg)
More About Photo Recovery for Mac
Photos Recovery for Mac is an all-in-one and easy-to-use yet professional Mac OS based recovery tool for Mac user to get back the lost or deleted photos, images and pictures. This powerful software allows you to recovers photos, pictures, images, movies, songs, and other multimedia files whick deleted or lost due to accidentally deletion, formatting, misoperation, virus infection, and other unexpected situations from Mac hard disk and almost any other external storage devices.
Related Articles
.jpg)
.jpg)


.jpg)
.jpg)
